|
|
|
|
| HOME SEW CRAFTS DECOR SHOP |
|
LAPTOP CARRYING CASE page 3
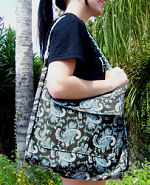
Tote Bag |
| lessons holiday patterns sewing patterns |
-> sewing patterns -> accessories
|
page 3 of 3
|
Directions - continued from page 2All seams are 1/4"WHAT ABOUT THE ENDS?
|
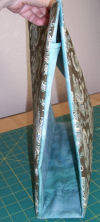 So far, so good, but what about the open ends?
ADD ENDS FOR BAGCreate End Pieces
Cut two outer bag fabric pieces, each measuring 15" x 4".
Iron one Craft Fuse piece to the wrong side of the lining. Iron one Craft Fuse piece to the wrong side of the bag fabric. Stitch the bag fabric to the lining fabric, right sides together, leaving one 4" open for turning. Trim seams. Turn right side out. Press. Leave the open edge as is for now. |
|
Add End Pieces To Main Bag Piece
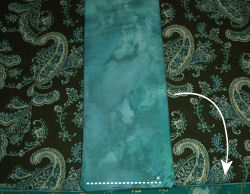
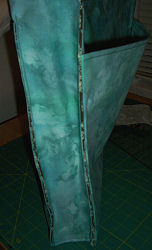
Now comes the tricky part. Stitch the end piece to the main bag, leaving 1/4" unstitched on each end of your line of stitching. Now pull the end piece over to the right to align its edge with the edge of the bag. Pin into place. Stitch the long side of the end piece to the bag. Repeat with the left side of the end piece. Now stitch the second end piece onto the bag. Turn bag right side out. The upper edge of the end pieces will be unfinished and longer than needed. That's fine for now. To see more of this method for attaching end pieces, go to our kitchen appliance cover pattern. I stitched the ends of the appliance cover to the main piece using the method needed here. Go to: Appliance Cover Pattern Refer to photos below.
|
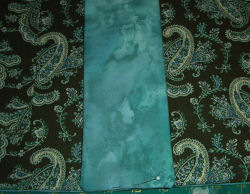 Fold the main bag piece in half, cross-wise, to locate the center. Mark the center of the bag on each side with pins. Fold one end piece in half, lengthwise. Mark the center of the finished end with a pin. Pin the end piece to the main bag piece, right sides together, aligning the pins (align centers).
LET'S FINISH THIS THING!
|
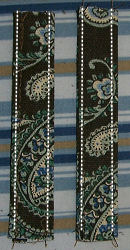
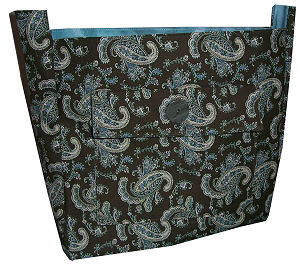 The bag is almost done. All that is left is the tabs attaching the handle. The handle comes with "D" rings on the ends. We will make little tabs (straps) that will be sewn into the opening on our two bag ends. These tabs will attach the rings of the handle to the bag.
ATTACH HANDLEMake Tabs
|
 The bag is almost done. All that is left is the tabs attaching the handle. The handle comes with "D" rings on the ends. We will make little tabs (straps) that will be sewn into the opening on our two bag ends. These tabs will attach the rings of the handle to the bag.
|
Press under the top, unfinished edges of the bag end pieces, so that the top of the bag is even all the way around. Do not stitch yet. |
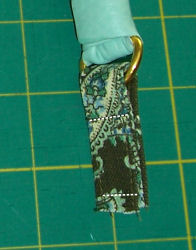 Slip a tab through each "D" ring on the handle. Adjust so tab ends are even lengths. Stitch across the tab ends, 1/4" from the unfinished ends. Stitch across again close to the ring.
|
|
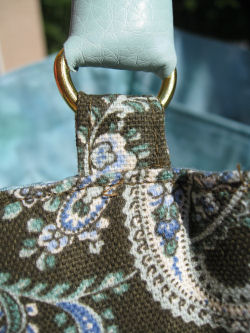 Push one tab/ring set into the opening of one end of the bag, aligning the stitching line closest to the end of the tab to the top of the bag. Pin into place. Stitch across the bag end, catching the tab inside. Your tab/ring is now stitched to the end of the bag. Repeat with the other end of the handle.
|
You can also loosely wrap the board in fabric. The bag bottom stiffens the bag, adding needed stability and shape. |
 Cut a piece of cardboard, plastic or particle board the size of the bottom of your bag (approximately 14" x 3 "). Cover the cardboard in fabric and place in the bottom of the bag. I recommend using an envelope back method of covering the board. This way, it is finished on both sides, and the board can be easily slipped into place. To learn how to make an envelope type back, go to:
|
page 3 of 3
|
Quick Reference |
Learn To Paint!free video tutorialsVisit my youtube channel. Free videos with step by step instructions. Paint beautiful paintings for your home. |

Please ShareI rely on advertising to keep my site free. Please share with friends. |
Privacy Policy & Terms Of UseBy using our website, you expressly consent to our Privacy Policy and Terms & Conditions. All Patterns, images and instructions are copyright protected. |