|
|
|
|
| HOME SEW CRAFTS DECOR SHOP |
|
WOOD LAMINATE FLOOR
|
| lessons holiday patterns craft patterns |

|
-> decor -> home improvement
Easy Install Wood Laminate!
free floating
|
Easy To Maintain Wood LaminateNeed to replace a worn out carpet? I love the look of wood flooring. Wood laminate is easy to install, and very easy to keep clean (I just use a damp wet-jet type cleaner". |
SuppliesFloor Supplies
|
 Enough wood laminate to cover your floor
|
Wall Patching Supplies (if needed - repair and paint walls before installing floor)
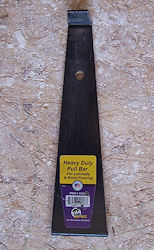
Putty knife
Safety NoticeREMEMBER TO FOLLOW ALL DIRECTIONS AND SAFETY PRECAUTIONS listed on product labels. Work in a well ventilated area. Use a dust mask and eye protection for all cleaning and sanding. Use gloves as needed. |
Directions
2. Following directions on cleaning product label, wash walls, window sills and any other surface to be sure the room is clean and ready for the new floor. This is not absolutely necessary, but if there is debris on the window sill that falls onto the floor, it will end up under the wood floor. It is important that your floor be clear of debris before the wood laminate is laid. 3. Decide on the direction your floor is to be laid. We chose to have the the floor run the length of the room (rather than across the width). We felt this looked better in the room. Also, the entrance is on the side of the room; one looks across the width of the room when entering. The wood runs across the line of site, rather than away from the person entering the room. Choose the direction you like best. |
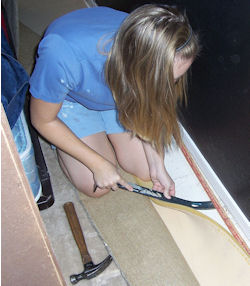 1. Remove baseboards, carpet and carpet pad.
 |
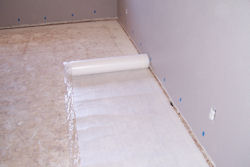
Roll out wood laminate pad. Roll out one roll from one wall to another - this will cover a few rows of wood flooring. Refer to photo. |
 4. Use a stud finder to locate studs (for attaching baseboards later). Mark studs with painter's tape (blue tape pieces in photo on right).
|
|
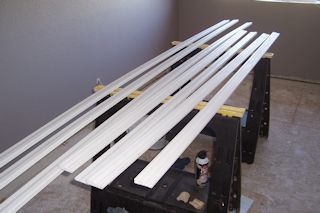
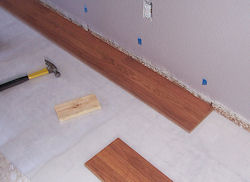 5. Mix up the wood planks if you did not get laminate from one dye lot. This way, you will not end up with a stripe down your floor (where one dye lot changes to another). If the planks are slightly different colors, they look best when intermixed around the floor area. The photo shows the first row.
|
|
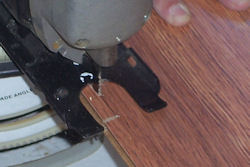
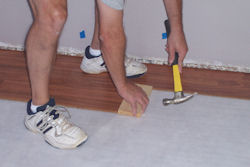 6. Work in sections. Lay an area of padding, then lay the wood planks end to end. Use a small piece of scrap wood and hammer to nudge the ends together securely. Lay the wood piece against the end of the last piece laid, then carefully hit the wood piece with a hammer. This makes the lines between plank ends less visible, plus holds the flooring more securely. The photo on the right shows an end piece of the second row being hammered into place. For rows two and on, hit the wood plank into place from both sides (long side edge and end edge).
|
|
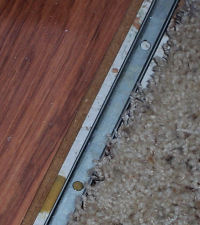 7. Lay the last row so that it comes very close to the edge of the flooring that adjoins the room (in our case it was carpet outside our room). We laid the flooring up next to the edge of the carpet at the door's threshold. Use a threshold kit to join the two different flooring types. A metal piece installed into the sub floor holds the decorative threshold piece (the covering that looks like wood that will cover this metal piece). The photo shows the metal piece installed.
|
|
 8. Cut any special notches (such as around doors and wall corners). A saber saw works well for cutting any needed notches. These will be covered by wall baseboard; be sure the notches do not extend past the area where the baseboard will cover them.
Special Tips
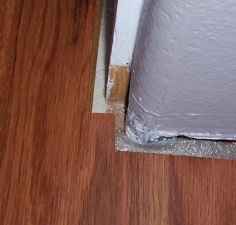
Remember that perfection is not needed at ends and sides near walls because baseboards will cover small gaps. Don't panic if you make a mistake. Purchase extra and always measure twice! If you have laid a piece and later realize that it doesn't join as snugly as you'd like (such as a special cut piece in a corner), use wood filler - also called wood putty - to patch the area. We had one open place in a corner that was too large to be covered by molding. The gap was not seen until the floor was finished. It was too late to replace the board without causing a lot of work. We cut a tiny piece to fill the gap and a small crack was visible where the pieces were joined. The tiny crack was filled with wood filler. No one will ever notice, unless it is pointed out. Wood filler comes in many colors. |
 Use the piece cut off at the end of the first row to start the second row. Repeat this with each row. That way, the ends of each wood plank will not line up exactly, making the seams between ends of planks less visible.
Finished
|
 We were able to keep our baseboards. They were removed, sanded, cleaned and patched as necessary - then re-painted for a bright, clean look.
|
|
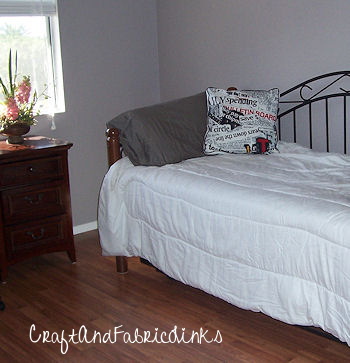
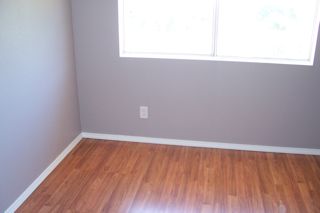 We had completely updated a room with black walls and old carpet to a cheery, bright room with a clean, crisp look.
Related Project
Plus DIY abstract painting. Update and add cheer to your guest room. |
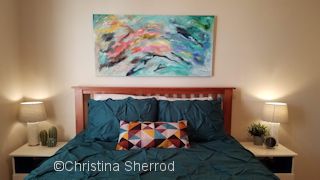 GUEST ROOM MAKE-OVER
Quick Reference |
Learn To Paint!free video tutorialsVisit my youtube channel. Free videos with step by step instructions. Create beautiful paintings for you home. |

Please ShareI rely on advertising to keep my site free. Please share with friends. |
Privacy Policy & Terms Of UseBy using our website, you expressly consent to our Privacy Policy and Terms & Conditions. All Patterns, images and instructions are copyright protected. |