|
|
|
|
| HOME SEW CRAFTS DECOR SHOP |
|
LETTER APPLIQUE PILLOW
|
| lessons holiday patterns sewing patterns |

|
-> sewing patterns -> pillows
|
Page 2: Create Pillow |
Custom Pillow With Padded Letter AppliquesThis page provides instructions for making the pillow. Please refer to page 1 for letter patterns and supplies list, plus instructions on cutting fabric and creating the letter appliques. |
Pillow SizeMy pattern creates a 16" square pillow. The letter appliques are approximately 6.5" wide x 8.5" tall. |
Directions continued from page 1Create Pillow Front With AppliqueCut a 16.5" x 16.5" piece of pillow fabric. Place your letter where you want it on your pillow front. I centered my letters. Pin in one or two places to hold in place. Iron the letter onto the pillow. The adhesive on the back of the fleece will hold your letter until you stitch it into place. Hand stitch or machine applique around the edges of the letter. Placing stabilizer under the main fabric can assist the stitching (I did not use stabilizer - see below). Repeat to create a pillow front for each of the pillows you are making. |
|
|
 For successful applique, use a narrow zig zag stitch with very short stitch length. I used a 2.5 width and .4 length. I did not need stabilizer, due to the fusible fleece. You might prefer to use stabilizer. I practiced with one letter on a scrap piece of fabric to be sure I was happy with the results. Use good quality thread and an applique foot. The applique foot has an opening in the back so that the stitches can easily pass through the foot. Stitch so that the outer stitch is just to the outside of the letter. The letter's edge will be totally enclosed, which will help prevent fraying.
Create Pillow TiesCut two strips of tie fabric, each 1.5" x w.o.f. (width of fabric, or about 41"-44" long). Cut the strips in half, so that you have 4 strips, each measuring 1.5" x approx. 20". Iron under 1/4" along each long side and each short side. Fold the fabric in half, the long way, right side out. Press. Top stitch around all three open sides, close to the edge. Turn tie over to be sure you have stitched through all layers. Repeat for each pillow. |
|
|
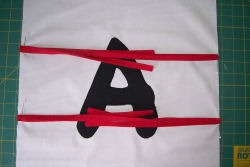 Fold each tie in half. Place ties on pillow front so that they are evenly spaced. I placed mine 5.5" from top and bottom of the pillow front. Pin tie so that fold of tie is at edge of pillow, on the right side of the pillow front.
|
|
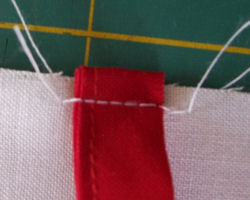 Baste ties into place, close to edge.
Create Pillow Back
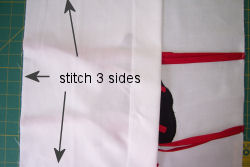
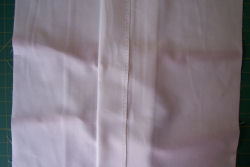
Serge or zig-zag stitch across one 16.5" side of each piece. Iron under the serged side 2" on each piece to create a hemmed edge. Top stitch hem in place. Lay down your pillow front, right side up. Place one pillow back down on pillow front, wrong side up (front and back are right sides together), lining up unfinished edges. The back's hemmed edge will be toward center of pillow. Be sure the tie ends are not caught between any edges. Baste around the three sides, close to the edge. |
 Cut the 24.5" x 16.5" piece of fabric in two so that you have two pieces, each measuring 16.5" x 12.25".
|
Stitch around all four sides, using 1/4" seam. NOTE: The two back pieces will overlap. |
 Lay down the other back piece, wrong side up, lining up the other end's edges. Baste into place.
|
Turn pillow covering right side out and insert pillow form.
|
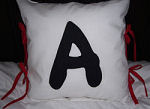 Completed Pillow
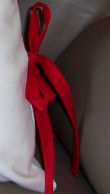 Tie bows on sides.
|
Page 2: Create Pillow |
Quick Reference |
Learn To Paint!free video tutorialsVisit my youtube channel. Free videos with step by step instructions. Paint beautiful paintings for your home. |

Please ShareI rely on advertising to keep my site free. Please share with friends. |
Privacy Policy & Terms Of UseBy using our website, you expressly consent to our Privacy Policy and Terms & Conditions. All Patterns, images and instructions are copyright protected. |